PC-naturalstoneus
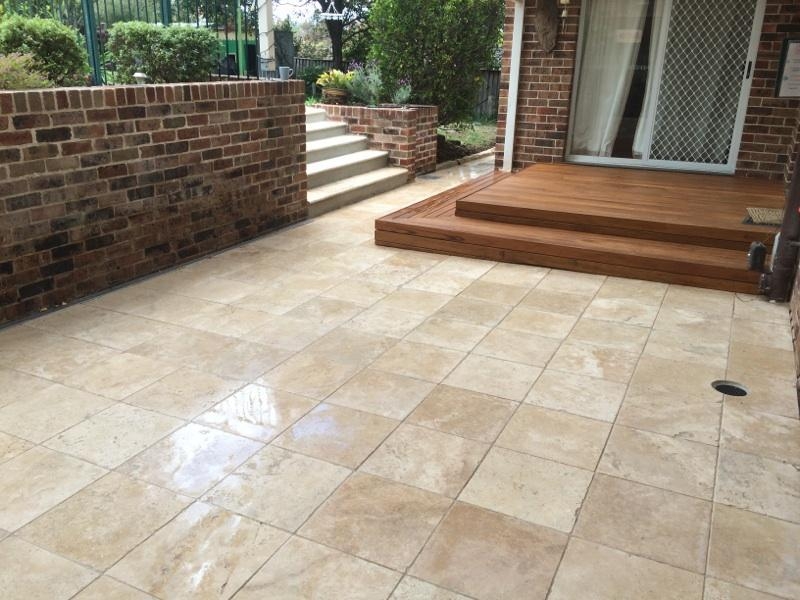
Travertine pavers have been favoured for their structural beauty, the strength they provide, and ability to seamlessly blend with both indoor and outdoor spaces. With 2025 just around the corner, the focus on home improvement has shifted to sustainability and elegant design qualities, and thus, an option still preferred for patios, driveways, pool decks, and walkways is Travertine pavers. This guide explores every step of the process in detail and offers practical advice for modern-day updates to ensure the success of your project.
Benefits of Travertine Pavers
Travertine is a much loved type of limestone that forms in natural hot springs, giving it a very distinct texture. Here are a few benefits of using travertine for your project:
• Durability: High grade travertine pavers last decades if preserved correctly due to their resistance towards heat, weather, and tear.
• Slip Resistance: Travertine has a unique quality of being safe to use in wet areas and around pools due to its natural textured surface.
• Aesthetic Appeal: Warming, earthy tones and different patterns add a level of sophistication to any design.
• Environmentally Friendly: Like all natural stones, Travertine is a sustainable choice that fits in perfectly with the eco-friendly trends of 2025.
Installation Process in Steps
1. Designing and Laying Out the Plan
Assume the final product and get to work. Note the following while making your sketch design:
• Patterns: French patterns for a traditional style, straight patterns for modern minimalism, or irregular crazy paving for a more natural look. These are the most commonly used options.
• Measurements: Work out the area precisely in order to get the number of pavers needed. Always remember to ADD 10% – 15% extra for unexpected changes and for cutting.
• Colour Coordination: Pick paver colours that accentuate the structure of your house as well as your landscaping.
2. Preparing the Site
• Clearing: All old materials, debris, and vegetation should be removed from the site.
• Excavation: Like the previous step, this includes the removal of old materials, step down and clear the area that is 6-8 inches below the surface, and also remove the top layer of old materials.
• Compacting the Base Layer: A plate compactor will be used to level out and evenly distribute the crushed stone or gravel. To ensure stability, this layer should be 4-6 inches thick.
3. Putting Down the Sand Layer
Spread coarse sand evenly to achieve a 1 inch layer over the compacted base. Use a screed board to level the surface and ensure that even pavers will be used.
4. Edging Installation
Setting up edge restraints sorely is what defines the borders. This serves as the most vital step, as it hinders the shifting of pavers over time. Therefore, paver edging materials or concrete can be used.
5. Paver Installation
• Start from one corner of the area with the paver installation and work your way around with the pattern you have chosen.
• Place each paver in sand and then use a mallet to tap it down appropriately using just enough pressure so the paver sits firmly in place.
• For an aesthetically pleasing look, it is best to keep a space of 1/8 to 1/4 inches between pavers.
6. Trimming and Cutting
Mark the pavers that need to be cut to fit along the edges and around bends before taking out the saw. Use a wet saw equipped with a diamond blade to obtain the most accurate results.
7. Filling Joints
Using warm sand or polymer sand, sweep the mixture into the gaps surrounding the pavers. This preparation step will lock the pavers in and also eliminate the ability for weeds to grow. To settle the sand further down, use a sand compactor.
8. Sealing the Surface
Use a sealant with strong weather proofing abilities in order to apply it onto the surface of the pavers. By doing this, the pavers will be protected from the damaging effects of stains, water and UV rays. In case the area suffers with foot trafficking or water splashing, reapply the seal every 2-3 years.
Installation Pitfalls to Avoid
1. A Skipped Process of Base Preparation: Ignoring this base preparation comes with the risk of the pavers shifting or even sinking after installation. So before carrying out the rest, make sure to compact the base correctly.
2. Ignoring Proper Water Flow: Always ensure there is an absent slope on the base so that water is directed away from buildings. This will maximise the drainage ability as well as avoid damage from pooling.
3. The Mislaid Sand Layer: If the sand layer is not levelled properly, the pavers will be misaligned and the surface will be uneven.
Modern Maintenance Tips for Travertine Pavers
1. Clean Pavement Regularly: Pavers must be swept and rinsed on a regular basis to get rid of dirt, debris, and stains. Damage to the stones might occur if other types of cleaners are used.
2. Washing With Force: A pressure washer should be used once every year to bring back the original look of the pavers. Seal the surface again after washing to ensure extra protection.
3. Monitoring for Weeds and Moss: Occasionally check joints to remove possible weeds or moss, and put back sand into the gaps if required.
Enhancing Aesthetics and Functionality in 2025
• Smart Lighting: Blend solar pathway lighting or in-ground LED accent lighting along the edges with the travertine in order to illuminate and emphasise the beauty of the material.
• Water Features: Use fountains, swimming pools and similar creations to complement the appearance of the travertine pavers and further enrich the setting.
• Eco-Friendly Landscaping: Use vegetation that requires little water to survive or even consider artificial turf for surrounding the pavers to reduce maintenance and water usage.
Unmatched beauty and versatility is what travertine pavers provide, and that is why it is in so much demand by users across the globe. Make use of these updated installation techniques and pro tips, and you will be able to add beauty and functionality to your space professionally and effortlessly as well as for 2025 and beyond.